Adding payment buttons to your website is the fastest, best way to allow your customers or clients make electronic payments. With December's VPS Upgrade, adding Payment Buttons to your website has never been easier.
Technical Difficulty: Easy (some experience with HTML) Time: 10 Minutes
Overview
- Log into VPSPay.com and go to Integration Tools
- Select a pay now button
- Copy and paste code to your web page.
- Edit the code.
- Save your page.
- Try it out.
Step 1: Log into VPSPay.com and go to Tools... Integration Tools.
If you are logged in, you can follow this link. You'll see collections of buttons and links followed by HTML code you can cut and paste to your website.

Step 2: Select a Pay Now Button
There are two choices:
 (on the top) and

Pick the design you think will work best.
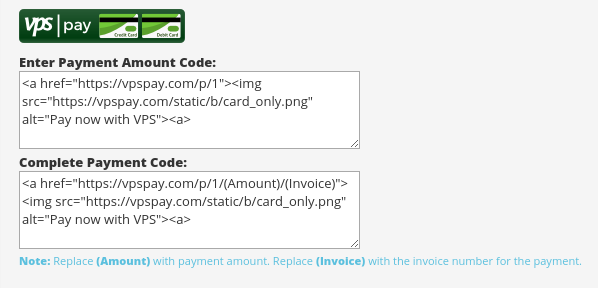
Step 3: Select Enter Payment Code or Complete Payment Code
Ther enter payment version sends the payer to a start page that has the payer enter the amount they would like to pay. The Complete Payment Code lets you set the payment amount and sends the payer to a page where they can confirm the payment amount and enter their credit card details.
Step 4: Edit the code (only for complete payment code)
You'll need to update the complete payment code with the amount and optionally, invoice number:
Original:

Edited:

Note: the amount of the payment has been changed to 157.75 and the invoice number to 45102. Here's a working example of the button that is tied to a demo account. When you click on it, you will be taken to a payment page for VPS that is in demo mode (no actual payments can be taken):
Step 5: Save your page
Make sure you save your page.
Step 6: Try it out!
Open you page and check out your shiny, new pay now button.
 Virtual Payment Systems